Wednesday, November 28, 2012

Living In A State of Lace

We're just days away from the launch of the newest collaborative art journal, Vintage Lace.  I finally got inspiration for the rest of my page, and solved the problem of the too yellow lace on the back cover.

This is what my unfinished page looked like:


I added to the above, and completed the left side of the page.


Remember, my theme is accessories, and I'm calling my page A Night At The Opera, but don't confuse it with the Marx Brothers movie.  It's all about the accessories a woman might wear/bring to the opera, back in the day.  Which day, I don't know.  History isn't my strong suit.  Just call it vintage. 
 
I had created a pocket on the inside front cover, and wasn't sure what I'd put in it.


Inside the pocket there are now four pouches, one for each of the other participants, holding a little gift from me to them.


The inside back cover is where I'm putting the ATCs we all agreed to make for one another, coordinating with our individual themes.  I have already received two, so they are attached.  When my book returns to me I'll insert the remaining two.  What you see here are Sox's and Tracy's ATCs.


This is the back cover with the yellow lace that was bothering me.


My solution was to sew some fabric flowers I made over the lace.  (The fabric was cut with Tim Holtz's Tattered Florals die, and many layers were cut.)  A bit of the offending lace still shows, but it doesn't scream YELLOW at me.  Yes, sometimes colors do shout.  Pretty good problem solver, I think.


I finished the back of my page with (what else?) lace.  I can sew two pages together, back to back, but if the other artists finish their page backs off nicely I will bind each page as a separate signature and just enjoy the lacey backs.  That doesn't have to be decided until my book returns home to me.


Saturday, November 24, 2012

Seasonal Wreath

I haven't purchased very many new products lately; not because there were none I liked.  I liked plenty.  The thing is, I already have so much, including some stuff I've never even used.  However, once I saw Tim Holtz's snowflake rosette dies I just couldn't resist. And as soon as I opened the packages I knew exactly what I would do with them first.

I wanted to create a wreath that could stay up throughout the winter, one that did not scream Christmas (no offense to anyone, but I don't celebrate the holiday), and in a color palette in keeping with the season (but no red and green).

Here's what I came up with:


I used both the regular sized and mini snowflake rosette dies, cut from some white on white scrapbook paper, and then lightly glittered.  The small non rosette snowflakes are also from Tim; they are his movers and shapers minis, and they were cut from some of the blue paper in his Vintage Shabby paper stack.  I rubbed some Stardust stickles on those.  The white "ornaments" are really some fake pearls from a broken necklace.  They too have a light coating of stickles.  Everything was put together and attached with a glue gun.  Yep, I went old school on this, and really, the glue gun is the best way to assemble the rosettes and get them to stick (with no drying time) to the wreath base.  Speaking of which, it is just a 10" paper plate with the inside cut out.  It was wrapped with some white lace so any section not completely covered with the rosettes and other embellishments would look pretty.


I think my next project with these wonderful dies will be the 2012 version of the snowman I made last year with the original rosette dies.  Remember this guy?  I love him!  Can't wait to give him a playmate.


Thursday, November 22, 2012

Thankful


Happy Thanksgiving to everyone who is celebrating.  And if you aren't, then just have a fabulous Thursday.

Among the many things I have to be grateful for are the folks who visit with me here, support my creative projects by leaving comments, or just dropping by.  I appreciate you more than you can know.  So, thank you.


Tuesday, November 20, 2012

Journal Mania

This past weekend was spent constructing journals.....a thoroughly enjoyable two days at Michele's studio, with great friends, and putting together two different books under the guidance of the very talented and lovely Dawn DeVries Sokol.

Saturday was Tape  and Doodle Stew.  I brought along about 50 pounds of tapes; masking tape, tissue tape, duct tape, washi tape.....lots and lots of tape.  Which is what we used to bind the pages together, as well as decorate many of the pages.  The covers were made from a flattened cereal box, and the pages themselves, an assortment of papers, bits of previous projects, and items my friends and I kept swapping back and forth.  Oh, and of course, a bit of doodling too.


I used some favorite papers, and leftover pieces from a Lynne Perrella workshop, Julie Fei-Fan Balzar's stamp carving class, and some art done by friends.  I think that's what makes this book so appealing to me.  Of course the question (for me) always is......will I actually use this as a journal?  I'll let you know how that works out.
 
Sunday was Jingle Journal, advertised as a holiday journal, but I really don't celebrate anything so I opted for a winter theme instead.  For this book, we deconstructed a hard cover book and used the covers (painted and otherwise decorated), substituting our own papers, done with a very simple sewn binding, and only one signature.


A weekend of art, wonderful.  A weekend of art with friends, priceless.


Many thanks to Michele for organizing these classes, and to Dawn for a great two days.  Oh, and thanks Michele for the classroom photos, which I swiped from your Meetup board.  :))  Speaking of which, why not go and join Michele's Meetup group so you'll find out about future classes.  She always has something going on, in the works, or on the calendar.


Thursday, November 15, 2012

Evolving Journal Pages

I've completed pages for two more books in my Artistic Evolution group.  Carla's overall theme is sunflowers, and the pages I was evolving from had three huge ones as a border (visible from my pages), so I went for a straightforward evolution.  Here is my two page spread:


And here is my first page with Jen's sunflower border on the left, which I clearly needed to incorporate into my pages:


After literally searching for hours for an image I wanted to use, I discovered I had an old Sizzix sunflower die hidden away.  Who knew?  I used that for the focal image on the first page, but added lots of texture.


The background paper started off as some very pretty Graphic 45 paper, though I doubt it is recognizable after all the stenciling and embossing I did over it.
 
Here is the second page close up.  The beautiful statue head is also from Graphic 45, and I just glitzed her up a little, giving her a sunflower headpiece and a little shading.  Of course, it is really a daisy headpiece, but I'm calling it sunflowers.


Lori didn't give us a theme to work with, just a general color scheme of red, yellow and green.  The pages that preceded mine featured a witch (evolved from pages with fairies), so I continued the flying theme with butterflies.


I started with patterned paper (old, from my stash, and I think from Stampin' Up) that already had butterflies on it.  I added stenciled, masked, and stamped butterlies, including one done with modeling paste.  Then I added some that I stamped on patterned paper,embossed to give them some texture, then cut out, and attached with some machine stitching, so their wings can flutter.  The off the edge border is made up of three butterflies cut with a ProvoCraft die, using some previously inked and embosed paper that I've had lying around for ages.  The right colors for this project.


Here is an angle shot of the butterfiles so you can see how they pop off the page.


And this is a closer look at the butterfly created with a stencil and modeling paste.


Looks like I'm all caught up with my journals.  Guess it's time to start thinking about some holiday cards.


Thursday, November 8, 2012

Lovin' Lace Is No Disgrace

Sorry about the title.  Sometimes the quest for cleverness only results in corniness.  Hey, this is the best I can do on two cups of coffee.

A while ago I agreed to be a part of an all fabric round robin called Vintage Lace.  Though I love to look at fabric books and admire the artists who make them, I'm not much of a fabric person.  Paper is my usual medium.  I have ventured off into metal, and yes, I have used fabric in my creations, but a book made almost entirely of fabric and lace?  I say almost, because embellishments of every type are allowed.  Anyway, I joined and wondered if I'd be sorry I did.

One day, I saw a fabric book embellishment that appealed to me, and decided to start with that.....creating a focal point for my book.  Start small.  Baby fabric steps.  One thing led to another, and the project seemed to take on a life of its own.  One weekend later and I was almost finished.  Guess I have a new obsession. 

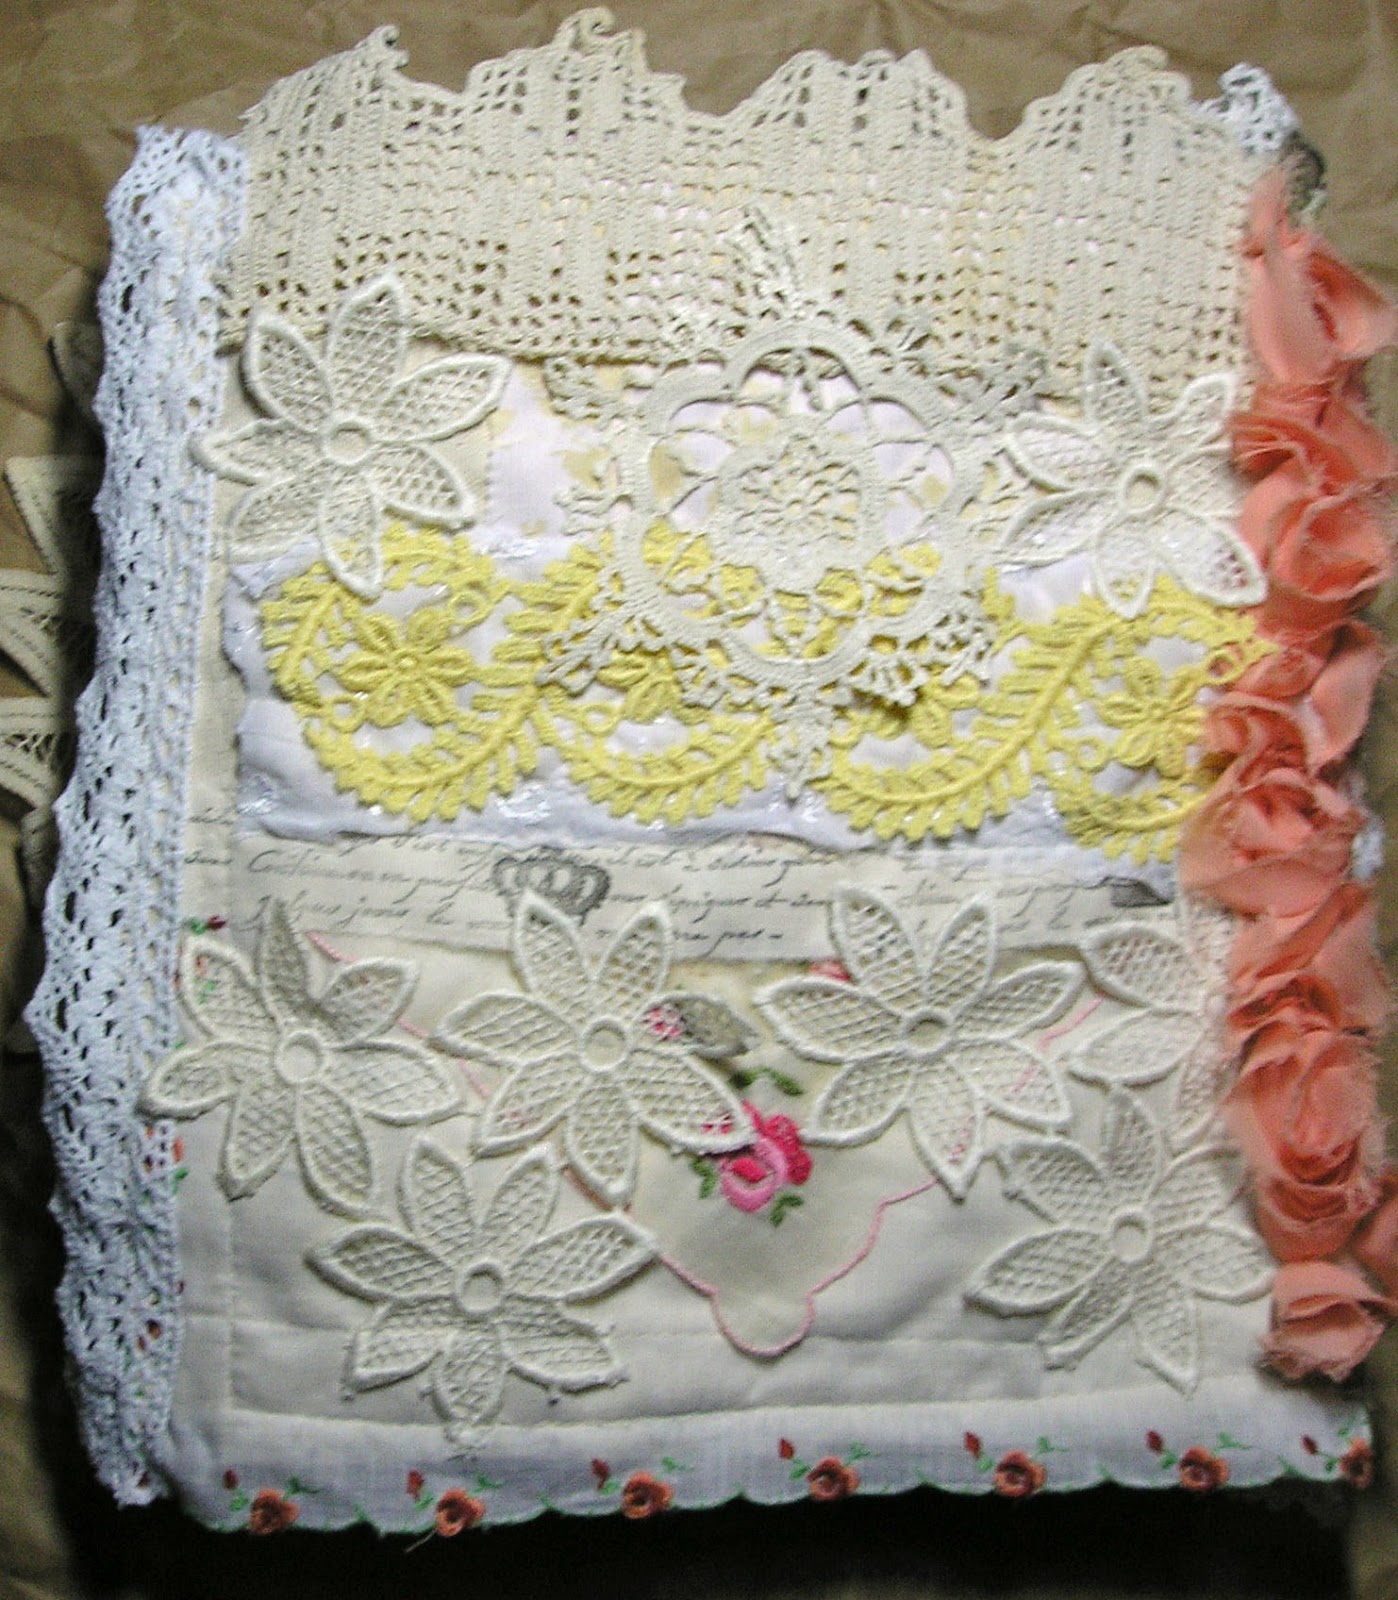
Here is my completed journal cover  It measures about 10"x11", including the trim.


As you can see, it is not only a medium I don't often use, but the color palette is also unusual for me.  Oh, and by the way, about 99% was sewn by machine or hand.  Very little glue was used.  Color me proud of myself!
 
The focal point is the heart, which is very dimensional, being stuffed with fiber fill.  I'm sure quilters don't use the term stuffed, but I have no idea what the correct term is.  Anyway, here is a closer look at the heart.  Beads and lace and tulle and flowers, oh my.


OK, confession time.  Originally the heart had a photo transfer on it, but I absolutely hated the way it came out, so I just added more trimmings right over it.  Like I always say, mistakes are just an opportunity to embellish.
 
I had fun with the spine, and am very happy with the way it turned out.


It's made of torn strips of fabric with lots of buttons sewn on.  If I live to be 100 I won't deplete my button supply, so it was good to be able to use so many in one project.
 
I'm not really totally satisfied with the back of the book, but I have until December to send it off to the next artist, so there's time for additions,.


I think the yellow lace is bothering me, so I may just soften it by covering it with some more off white lace.  We'll see.

I've kept the inside covers fairly plain (for now), but since I very much like the eyelet lace fabric I used, that's OK.  I did create a pocket for the inside front cover, though I haven't a clue what I'm going to put in it.  Maybe little gifts for the other participants????  BTW, this is a VERY small group; there are only 5 of us, so that idea isn't too far fetched.


We are also doing one page of our own to send along with the cover.  (The book will be bound upon its return).  I have worked on mine; it is unfinished but getting there.   We all chose themes for our books (someone chose Paris, another, fashion).  I chose accessories because....do I really have to explain?  What is better than accessories?  What embellishments are to crafts, accessories are to fashion.  The complete it, enhance it, and let's be honest.....you don't have to go on a diet to fit into your favorite hat, pair of gloves, scarf, necklace or brooch.    But I digress.  Here is my work-in-progress page.


When my brother and I were cleaning out our mom's Florida condo after bringing her back north to live, I found a pair of long lacy gloves.  I have not a clue why my mother had them; they are so not her style.  But I love the idea of using them in my art.  This is a very tone on tone page and I just want you to know that it is a lot more interesting in person with all the different textures.  And, remember, it is unfinished.
 
The ringleader of this group is my friend Sox.  Yep, for a change one of our projects didn't come from Elena's fertile mind.  Since we're not launching until December, Sox decided we should prime the creative pump by doing a fabric/lace ATC swap.  I worked on mine this weekend, and here they are, all five of them.  Yes, I am keeping one for myself.


The very much simpler (yet also stuffed!) heart is a nod towards the one I made for my cover.  It's actually the only part of the ATC that was sewn.  I am not good enough on the machine to sew in such small spaces, and I lack the patience to completely hand sew the whole shebang.  So yes, glue was most certainly used.


This is what the back looks like.  I used sticky back canvas, attached to the front, and it was also used on the dress form (Tim Holtz die).